Delicious Tortillas from Scratch: how to guide, tips and tricks
Tortillas are the backbone of Mexican dining – both every day and for special occasions. But how to make tortillas at home when you are far away from Mexico?
Whilst there is always a chance you can buy some in your local supermarket, I believe there is so much more to tortillas than just using a shop-bought pack.
Being a taco addict, I just cannot imagine my tacos without a delicious tortilla.
In the majority of situations, Mexican tortillas presume pliable corn ones. Yet, in the North of the country, they use a lot of wheat tortillas. Whilst these delicious corn tortillas are best for tacos and small quesadillas, those Northern wheat tortillas are awesome for the burros / burritos and for some regional tacos too. Let’s dig deeper into all of this corn and wheat tortilla thing.
Worldwide, you can get corn flour easily. There are quite a lot of dishes made with polenta, grits and cornmeal. Yet, when it comes to taco shells, there is one distinctive difference when it comes to Mexican corn dough. It is nixtamalised.
What it means is that corn is briefly boiled in the calcium-hydroxide solution, steeped in it for up to 12 hours and then ground into a wet dough (pliable paste-alike consistency). What really happens during this ancient technique is that corn undergoes a process where its nutrients become more bioavailable for humans. The second benefit here is that the nixtamal dough can be shaped into those taco shells (usually about 5in in diameter), and then briefly fried on a comal they turn out pliable and not brittle. If you are going to try the same thing with the regular cornmeal you’d get a similar result however your tortilla will break if you try to fold it even slightly.
Moving forward, I’d get you all the information on how to make corn or wheat tortillas together with what equipment you’d need and many tips and tricks that I’ve learned when going through the hundreds of them. Let’s go!

How To Make Corn Tortillas
Iconic corn tortillas are a signature vessel for the majority of tacos. Yet as I briefly mentioned earlier, usual cornmeal or cornflour won’t be suitable.
To make real corn tortillas, you need one of these: either masa or masa harina. Whilst I can probably already write a book on masa, let me outline it for you.
Masa is a corn dough. So if you make your nixtamal corn first (in the US you can find cans of so-called – hominy, this is nixtamal corn) and then grind it into a paste, you get your masa.
Here are a few issues: whilst there is no problem in buying a small packet of cal (that above-mentioned calcium-hydroxide powder) and nixtamalising your corn kernels (you would need to buy dried field corn, not the sweetcorn), there is a bit of a pickle how to grind it into a paste. Most dry grinders won’t simply even start doing the job, most food processors would grind it in a very coarse texture or way too wet if you start adding water to get the blades running easier.
How to Make Homemade Masa
There is a manual hand mill (molino mano) on the market. It’s not expensive, but I found it so labour intense it’s crazy. I was grinding and grinding some half a kilo of my nixtamal corn for almost an hour. It’s tiresome, it’s a bit flimsy, but it produces fairly good results if you just need a tiny quantity.
There is a professional range of wet grinders made specifically for this purpose, but they are costly (Masienda’s Molinito will cost you $2000), fairly bulky and are suitable for medium+ sized commercial operations. And on top of all that, fresh masa ferments and spoils very quickly. So for the home use, unless you are really need quite a large amount of it, it is quite a task.
But fear not, as a single guy, I started experimenting with what would be possible to do. Here are my findings. To start with, some of the bloggers suggest using a food processor and a conventional oven to achieve a drier result. So you basically use a high-speed bowl and start adding water to your nixtamal corn until it really turns into a smooth paste. After that, you line a baking dish with the parchment, put a single layer of your corn paste and the oven dries your paste to a needed masa consistency. I’ve tried that and I was not fully satisfied with the result – the dough was almost as if more cooked, had a little toasty smell to it and did not yield consistent results. Yet I still think it is one of the easiest ways how to get your masa homemade.
Instead, I turned to another of my Ninja appliances – the multicooker, which has a dehydrator mode. So I’ve made a corn paste similar to what I would do before putting the tray into the oven, but instead, I’ve dehydrated it to a fairly dry and solid state. The dried pieces of ground nixtamal corn were then put into a high-speed blender (I’ve used Ariete BlendyPro 2000) and it blended it into a flour-like consistency. Now, this is now called masa harina.
Masa harina was invested about a hundred years ago with the purpose of prolonging the life of masa and making corn tortilla prep much easier.
But yet again, I live in a part of the world now where there is no masa harina in any of the shops, so what could I do? I can make my own!
So if you are like me and are unfortunately out of options to get masa harina, you can also make your own now!
You can buy masa harina online or at specialist shops. Popular brands of masa harina that I’ve tried are Maseca (probably the most well-known yet I find the flavour somewhat generic and bland), King Arthur Organic Baking Company or Bob’s Red Mill (both are organic and good, yet I found them on the drier side) and a range made by Masienda using heirloom varieties of corn (yet my best tortillas, tasty and flavourful).
So when you are rehydrating masa from the flour you need the following proportions: 300 g (2 cups) masa harina and 325 ml water. I prefer adding a pinch of salt (optional). Yet what’s most important is achieving that paste-like consistency which would be pliable, but not sticking to your hands. Trust me, after making it a few times you would know. To do just that, pour 2/3 of water into masa harina first, knead it for a while and then add the remaining water in small increments, checking the consistency all the time. As practice shows, you may need a bit less water or, as with my latest packet of King Arthur masa harina, a little bit more.
If you want to measure precisely, my tried and tested ratio is 1 cup of masa harina by Maseca which comes at 115 grams, to 160 ml of lukewarm water and a pinch of salt.
The final step is to form tortillas and fry them.
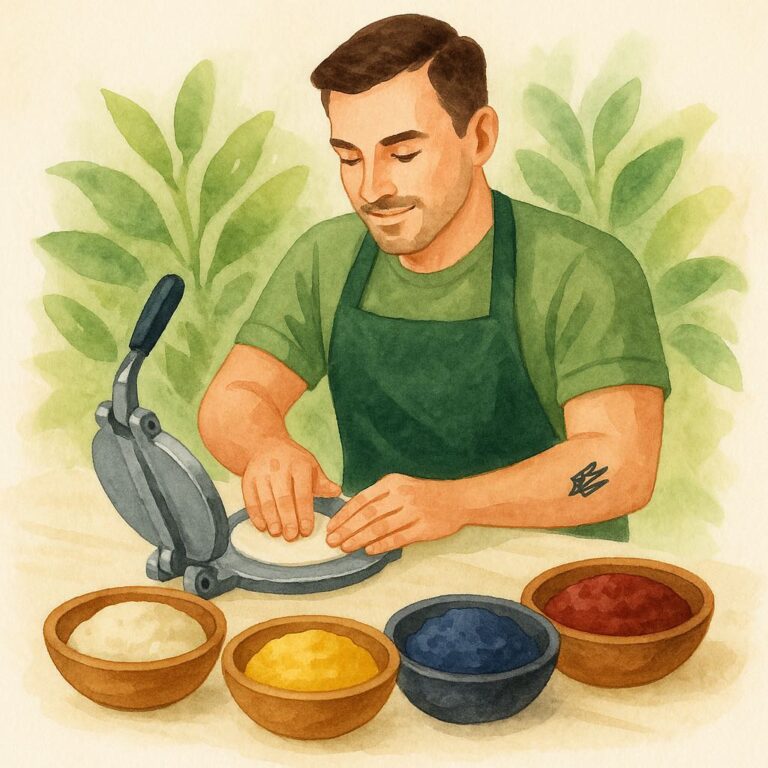
I’m using comal (cast-iron griddle) and tortilla press (Victoria cast-iron is the best, it doesn’t cost much more than the lightweight analogues but does the job so much better, you’d thank me later).
The tortilla press makes rounds of approx 5in in diameter, so cut two pieces of plastic out of a simple clear plastic bag or zip-lock bag. Roll a ball of your prepared masa (in the beginning, to make it right I was using a heaped 1/4 cup measuring spoon to scoop the masa in even portions, but you’d soon learn how to shape masa into small golf balls). Place the ball in between your cut plastic pieces and then using the press, flatten it into a tortilla.
You need your griddle to be extra hot, so wait for it. In the case of corn tortillas, as your masa doesn’t contain additional fat, you may want to very lightly brush the surface of your griddle with the neutral oil. Make sure it has a high-smoke point. When it is sizzling, carefully peel the top plastic, take the bottom part into your hand, flip the tortilla onto the other hand and then peel the other part of plastic. So you are left with your thin tortilla on your palm. Carefully place it onto your comal. Wait for 15-20 seconds and then flip it on the other side, fry for an additional 20-25 seconds and flip again. On your third flip your tortilla puffs, it means you’ve achieved corn tortilla perfection!
Recipe Card

Corn Tortilla with masa harina
Ingredients
Instructions
- Weigh all the ingredients and knead well. You need the consistency of a soft Play-Doh. Leave to rest, so the flour can become more moist. Like a real homemade masa!
- Heat your comal or cast-iron skillet. It should be very hot to start frying and flipping as required.
- Meanwhile, cut two pieces of plastic (I prefer the halves of zip-lock bag for the sturdiness of its plastic).
- Now, measure approx. 1/4 cup of masa and place the ball in between of the plastic liners. Press it to a 1/4 in or even thinner (you will need to be able to unstick the tortilla from one liner first). Then, using the other hand, get the other liner out and slowly transfer the tortilla to comal. Do not just drop it there, it may cause some air to be trapped in the middle, but instead slowly place it there.
- Wait for 30 seconds, and then flip it.
- Wait for another 30 seconds and flip it again for the last time for further 20 seconds. At this point your tortilla should be puffing up. You can assist this process by pressing with your spatula on the edges of the tortilla.
- But fear not, puffing is something you’d achieve soon enough, you need some practice with kneading, pressing and flipping first.
- After that, transfer your prepared tortilla to a warmer. You’ve done it!
Note
makes around 12 corn tortillas of 5in each – the usual size for tacos
A few notes you may want to take into consideration.
If you are making it for the first time, do a test and fry it even quicker; your task is not to over fry your tortilla (that makes it dry and brittle). By doing that you’d have your perfect timing for flipping the tortillas.
Another reason your tortilla doesn’t puff is that it’s too dry or wet. You’d notice it even beforehand: dry tortillas, when you press them, will display brittle and torn edges, it means your dough needs a touch more water; whilst too moist tortillas will stick to everything – your hards, plastic, so you’d need to add more masa harina to your dough.
And as I’ve mentioned you can try using different corn varieties for your tortillas. It’s so much fun! Yet what I’ve found is that they also have different dryness and structure, so they won’t yield the same result, you’d also need to adjust the water amount and cooking time. I prefer to cook with white masa harina. I found yellow to be quite similar. The biggest difference I found with red or blue corn – they are much drier and sturdier, so my tortillas frequently turned out a bit more brittle and less pliable. Yet again, they suggest slightly different flavours and textures, so why not try them too? It’s really exciting!
How to Make Flour Tortillas
The recipe for flour tortillas is quite simple.
Recipe Card

Wheat Tortillas
Ingredients
Instructions
- Blend flour with fat and add salt. Mix in warm water and mix with the dough attachment of your food processor for 15-20 seconds. I use a small but powerful Ninja food processor with a dough attachment (it is not a hook-shaped one, but it gets the job done very quickly for the small batches).
- When ready, knead just for a few seconds with your hands to feel the consistency, make sure it is elastic, pliable and not sticking to your hands.
- Divide into 6 pieces, form balls and let chill for 10-20 minutes in the fridge. While this cooling stage isn’t that necessary, it would be considerably easier to roll the chilled pieces.
- For forming the tortillas I recommend you use the traditional rolling pin. Whilst you can try to use tortilla press, the elasticity of this dough calls for a rolling method. For that, you use a rolling pin and two pieces of greaseproof paper. Lightly oil the insides of the paper, place the dough ball in between and roll. Carefully pull the top layer, then pull the dough out of the bottom layer and quickly try to stretch it with your hands further. You want your tortilla to be more or less uniformly thin.
- Warm up comal (griddle pan, preferably cast iron) and keep the temperature medium, not to burn the tortillas too quickly. No need to oil the pan, your dough already contains the fat.
- At this point, the timing is crucial – fry on one side for up to 20 seconds, flip and fry for another 20 seconds; flip again, and it should start puffing. That’s how you achieve your perfect flour tortilla.
Note
makes 6 medium-sized tortillas (for tacos you can even stretch it into 8 pieces; but for burritos you need to divide the dough into 4 parts to make the bigger ones)
Note on achieving the puffing effect: it didn’t come easy for me, I was wondering what I was doing wrong. Here are my learnings. To start with, try to make your tortilla thin, and stretch it with your hands further to avoid parts that are on the thicker side. Secondly, it is about timing – if you overfry the tortilla on one side, it might dry up and would not puff. Experiment, flip earlier if in doubt. When your tortilla puffs, it will guarantee that buttery and flaky consistency, truly delicious!
Now, here is my note on fat: I’ve tried vegetable margarine, refined coconut oil and full-fat butter. Margarine was ok, but my tortillas had a touch of a weird smell and turned out slightly more yellow in colour. Refined coconut oil worked better but tortillas turned out to be on the greasier side, you may want to reduce the amount of oil slightly. Butter turned out perfectly and yielded very consistent results everytime.
Half and half cornflour and flour tortillas
I’ve experimented with tortillas made of wheat flour and regular fine cornmeal. This recipe is very simple as wheat flour makes these tortillas quite elastic, so you can use regular (not necessarily nixtamal) cornmeal (just make sure it is as fine as possible and not coarse).
I’ve used my recipe for flour tortillas and simply replaced half of the flour with fine cornmeal. The resulting dough was a touch too wet, so I added 1/2 cup of extra wheat flour to the dough. Yet see for yourself, different flour brands might work slightly differently. I’m using my Ninja food processor with dough attachment and make sure the dough is well kneaded and becomes an elastic ball. Cut the dough into 6-8 balls depending on how large you want your tortillas, cool down in a fridge, and then roll. As with the regular flour tortillas rolling was much easier than using the tortilla press.
Storing freshly cooked tortillas
There are some items on the market that allow you to keep your tortillas warm for longer. Starting from an easy tea towel that you can use to cover your tortillas with, buying a pouch or a box. I’ve tried them all and found out that buying a simple pouch worked best for me.
Choosing Between Corn & Wheat Tortillas
Whilst for some people the choice between corn and wheat tortillas will be easy, let me outline the usage considerations.
Clearly, if you are gluten-free, corn tortillas are your go-to solution to everything Mexican or Latin-inspired (and Mexi-terranean, too). I’ve met people who told me they didn’t like corn (a bit weird, but hey ho, I thought). Wheat tortillas are delicious for them.
If you compare the recipes, wheat tortillas are made with considerably more fat, so they will be higher in calories, that’s for sure.
Another consideration is the consistency of the tortilla – wheat ones will soak your sauces much better and might become mushy within a short period of time, whereas corn tortillas are of sturdier consistency and generally would keep their shape and structure for longer. With this thought, I try matching more juicy Mexican fillings with corn shells while leaving less saucy for the wheat ones.
How To Make Tortillas – Now It’s Your Turn!
Let me know how you get on making tortillas at home and what works for you the best? Which tortillas do you like the most?
By Dito
Restaurateur. Wine Expert & Educator (dipWSET). Flexitarian Chef. Senior Marketer. Entrepreneur.
Learn more about Dito


